DSLR film scanning? Or dedicated film scanner? And film scanning and editing software?
by Lukas Büsser.
A personal story of film digitization – or is my approach still the right one?
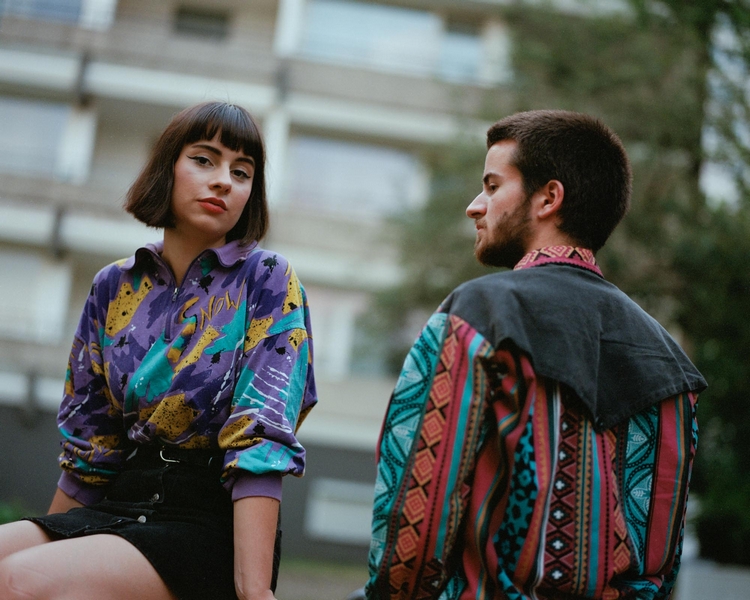
Epson V850 with Silverfast as DNG file. Converted with Negmaster 2.3.
I was born in 1990. As photography became interesting during my late childhood and early adolescence, I witnessed the rise of digital photography and at the same time, memories of film dropped off at Media Markt slowly faded.
In 2016, I could afford my first 35mm format digital camera. I was excited by the high image quality, however, I quickly became bored with the clinical cleanliness of the output files.
I acquired a few vintage lenses and before I knew it film became my preferred shooting medium. It was 2018 and desirable cameras were still affordable, and so both 35mm and medium format cameras came into my possession.
Suddenly, the question arose: how do I digitize my film? Unfortunately, I could not have a darkroom so the hybrid way of working was the only realistic method for me to see the results.
In general, I don’t like to give away things that I can do myself. I didn’t see film digitization as witchcraft, and in my search for a good all-in-one device, I acquired the Epson V850 flatbed scanner. I was immediately impressed with the resolution on medium format film, and felt that I had made the right step into the hybrid field.

A 6×7 negative on Kodak Portra 400 pushed one stop, very thin and reduced contrast on the left side. Digitized with a Canon EOS R5, Canon EF 100mm 2.8 L IS USM Macro, Yongnou Flash, Softbox, Essential Film Holder. Converted with Negmaster 2.3.

Same as Figure 1 plus Lightroom’s Flat Field Correction applied. Uneven illumination was compensated via a calibration frame, taken without the film in the film holder.

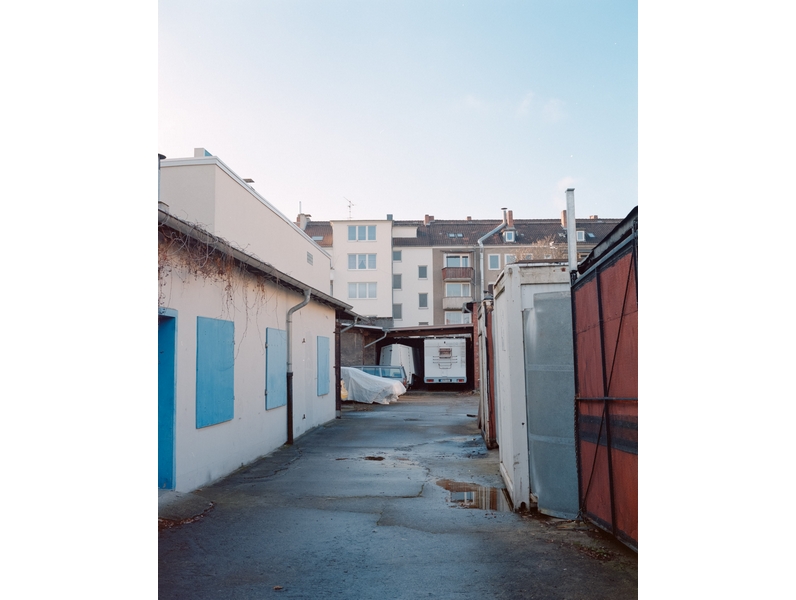
Epson V850 with Silverfast as DNG file. Converted with Negmaster 2.3.
However, what soon bothered me was the incredible slowness. First a prescan, then the main scan in RGB, a multi-exposure exposure, and last but not least an infrared exposure for dust removal. With 35mm film, this could take a good 1.5h. In addition, while I was reasonably happy with many of Silverfast’s color negative conversions, the Kodak Portra 160 and 400 profiles were continually giving me a hard time. This was compounded by inconsistencies in a series, a lack of ability to synchronize conversions, and the lack of manual intervention in reversals as such. So digitizing cost me time, and the images themselves were rarely ready right away. So I was on the lookout for alternatives.
In the fall of 2018, I took a big part in the launch of Negative Lab Pro. The digital camera as scanner, the film in a negative stage, an LED panel as light source – it all sounded tremendously plausible and time efficient. No one would need film scanners anymore! In five minutes, an uncut 35mm film was digitized, and fifteen minutes later, the images were ready. This left more time for photography, 35mm was finally fun again, and Vuescan delivered raw files of my medium format negatives that could be reversed just like the DSLR scans. A perfect world, actually.
Three years and several program versions later, however, I found myself in an unfortunate situation. Negative Lab Pro was showing me its limitations more and more often – or maybe my tastes had shifted, or maybe my eye had matured over time? Everything I expected from the new workflow and the plugin was delivered. My series were consistent, I could influence the conversion parameters and, what’s more, it was fast. However, it took a long time to deal with the single image that needed to be finalized, and more and more often I was unable to arrive at a result that I could call “finished.” Whenever I encountered certain images in Lightroom, I opened Negative Lab Pro and changed them because things caught my eye that weren’t optimal. My images were always in flux, never really finished. New versions of the program and changes in best-practice scanning methods kept me going back to old images for technical reasons and I rescanned them several times.

A 6×7 negative on Lomography Color Negative 400. Digitized with a Canon EOS R5, Canon EF 100mm 2.8 L IS USM Macro, Yongnou Flash, Softbox, Essential Film Holder. Converted with Negmaster 2.3.

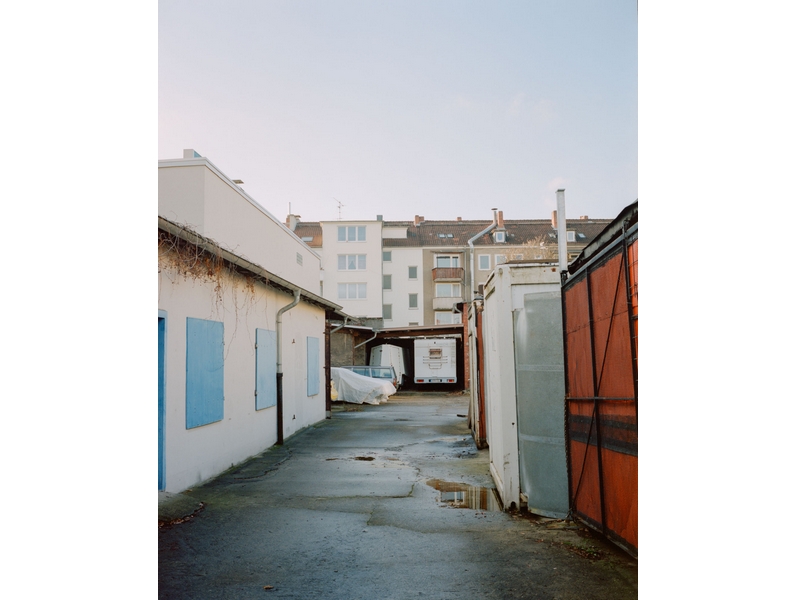
Epson V850 with Silverfast as DNG file. Converted with Negmaster 2.3.
Negative Lab Pro was a great door opener at the time, wresting the privilege of negative conversion from scanning programs. However, when my conversion setup resulted in Vuescan files having a simultaneous green and magenta cast after conversion that could not be corrected out, and 35mm scans from my Canon EOS 6D always showed a toxic green instead of yellow, the time was right to look at alternatives.
I came to Negmaster expecting to get “true film colors” and to be able to deal with my images instead of having to pick them up again and again. Negmaster now fulfills both of these expectations, but again, it has been something of a long road. I retired my Epson V850 and in the meantime found it to be a somewhat overpriced document scanner. A high-resolution digital camera was henceforth the means of choice, I wanted to photograph and already knew that a Kaiser light panel is the worst of all conceivable possibilities, because it produces too warm light. After all, if you put the white balance into the frame with warm subjects, it quickly reaches its limit of 2000k, which is not good for the dynamic range of the sensor. A flash is reasonably cool in its color temperature and thus avoids this problem. The oft-cited CRI value for the expected trueness of colors produced when a light source illuminates the subject is also 100, which is the maximum value. So what could possibly go wrong? (Spoiler: quite a lot.)
The first problem is large-area illumination when the light source is a system flash. You can’t get around a softbox and several diffusion elements here. Every single one of them swallows light. If the flash output seems too strong at first when only 35mm film needs to be illuminated, it is often operated at nearly full power when the diffusion needed for medium format is installed. Nevertheless, it is possible to get good results with such a setup. However, a lot of variables have to be right for this to happen: The film must be properly exposed, and the subject must not have extremely dark, large-area elements that extend to the edges. In addition, the exposure must be correct when photographing. This means: a different type of film, a film development with different chemistry or just a different exposure, and the painstakingly set-up digitization setup can no longer be relied on. The most obvious example of this problem was a Lomography Color Negative 800 that was developed in a large lab. Various sources proved that an 80a filter with its blue color would best compensate for the orange mask and give the white balance more leeway. The result is RAW files that can produce warm results after conversion without any problems. In the case of the CN 800 in question, this worked great. Using the Temperature slider in Lightroom alone, the image could take on very cool and very warm tones as desired without suffering dramatic color casts. The result was wonderful Negmaster conversions. I seemed to have finally found the Holy Grail, and after quite a few rescanned negatives from my stock, realized that once again I was not holding a universal solution. My Kodak films from the specialist lab with comparatively red mask suffered never seen color casts. There’s a good chance that my diffusion material produces a particular color of light that, when combined with my flash, film, and 80a filter, results in an unusable color mix.
A 6×7 negative on Kodak Portra 400. Digitized with a Canon EOS R5, Canon EF 100mm 2.8 L IS USM Macro, Yongnou Flash, Softbox, Essential Film Holder. Converted with Negmaster 2.3
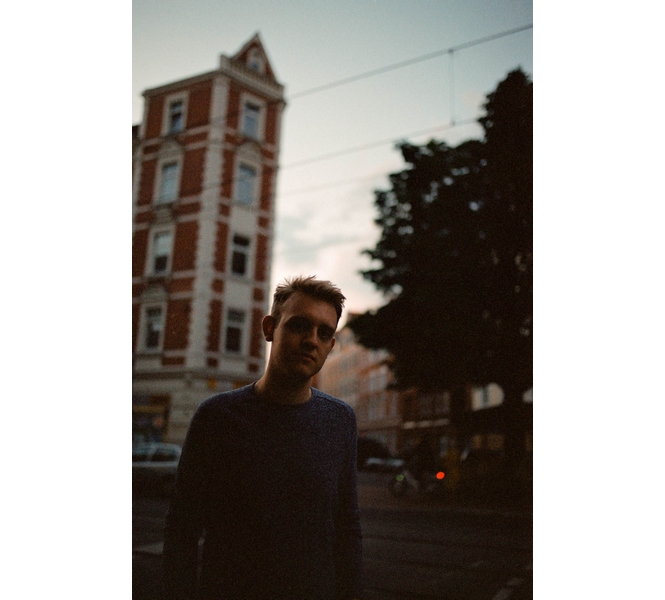
Epson V850 with Silverfast as DNG file. Converted with Negmaster 2.3.
Unfortunately, true color is not the only problem in DSLR digitizing. A lot of thought goes into building a working set of diffusion that will illuminate a 6×7 negative with similar quality to what a scanner does. If the light is not uniform enough, more diffusion must be added in the right place. If it is too diffuse, new problems arise. Does the environment reflect when flash is used, and does light emitted from it fall back onto the negative? Is stray light coming into the lens? Is the lens coating adequate for the task?
Two goals are pursued when photographing color negative films: Uniform, clean illumination and correct color. If both are given, the user has a fast, high-resolution, efficient way to digitize film – but usually we do not. Even if we can photograph unproblematic material without any problems and with good colors, nothing guarantees that the next film, the next negative will also work.
A workaround for uneven illumination of negatives can be Lightroom’s Flat Field Correction. Here, for negatives where the lack of perfection in the photographing technique is apparent, a blank reference image is taken and offset against the negative. In theory, clean source material is then available for reversal. In fact, a jump in quality can also be perceived, but where uneven illumination, stray light or the side effects of a very thin negative interfere, sometimes arbitrary corrections have to be made by Lightroom’s vignetting correction in the lens correction against it.
With this workaround, it seems as if everything can be saved in post-processing. Unfortunately, the reality is different: wrong colors in the negative’s digitized image will most likely lead to wrong colors after conversion by Negmaster, even if avoiding color casts works very well. The reward is a clean digitizing job where as few mistakes as possible happen. If you start with suboptimal material, you will have to sacrifice a lot of work and also time in post-processing. And even when trying to work very cleanly, there is no guarantee that this can always be achieved.
All of this leads to an undesirable situation. Our goal was quick and easy negative conversion. But in the worst case, we invest a lot of time and money in optimizing a workflow that delivers 80% good, 15% acceptable, and 5% unacceptable results, depending on how well our own negatives are exposed and developed. We are also evolving in light of this work on technology. We perceive errors in digitization more consciously the more we are confronted with it. What I wouldn’t have seen six months ago jumps out at me today as material for bad dreams. Let’s face it, the continual optimization takes more time than simply scanning the negatives.

A 35mm negative on Lomography Color Negative 800. Digitized with a Canon EOS 6D, Canon EF 100mm 2.8 USM Macro and LED-Panel. The lower half of the negative is very thin, simultaneously leading to loss of contrast and brightening of this area in the DSLR scan. Converted with Negsets.
Plustek 8100 with Silverfast as DNG file. The film scanner shows the true brightness values in the image. Converted with Negsets.
Back to the roots
André Eikmeyer, as a faithful companion through all phases of enthusiasm and despair, had long since had a profile of the Epson V850 in Negmaster that worked with files from Silverfast. So I put a negative strip in the film holder, opened the long-dusted Silverfast and ran a test scan without Multi Exposure and other time-eaters, selected the linear conversion profile, launched Negmaster 2.2, and got a one-click image with restrained saturation that was free of color casts and showed no off-color at all. That was incredibly easy. Several negatives followed, and even though some needed more work, the results were right in the end and I had truly final images in my hands. At the same time, tests with Vuescan showed that further adjustments are necessary to achieve neutral results. How well the program can do in this approach to color negative conversion compared to Silverfast will have to be seen in future tests. Probably good results are possible, but with considerably higher effort in operation.
Negmaster’s claim is that the plugin does not add colors during conversion, but works with what is in the negative. With scanners, in combination with the right software, we can expect excellent results. DSLR scans will never quite reach this level in terms of color and overall image quality, but automatic color balancing can correct for color casts introduced by the light source in the digitization. So a high standard in the DSLR workflow can make you very happy with 35mm film. However, this does not mean that you will reach your goal any faster.
The scanner as a time saver
It sounds implausible. A flatbed scan at 3200 dpi costs the Epson V850 a whole 2 minutes and 30 seconds. A Plustek 35mm film scanner takes a good minute for a negative. Of course, it takes longer to digitize a film by scanner. However, the time until an image can be called finished is far shorter than with DSLR scans, when similarly high demands are made on the result. If the DSLR scans are of very good quality, this may not be true. However, as soon as errors are discovered in the digitization, a fresh start is necessary, including troubleshooting. Picking up the negative again, making changes and checking them for effectiveness takes longer than any scan.
Delete a variable from the equation
Let’s perceive our result simplified in the same way that mathematics provides with the end product of an equation. On one side is film, film processing, digitization, and conversion. On the other, our finished image. There can be variations in the film emulsion. We all know how variable C41 development can be. The conversion runs predictably through Negmaster in the vast majority of cases. With a film scanner, the element of digitization as a variable is removed from the equation. That’s because a scanner accomplishes what we can’t with a DSLR: Absolutely even illumination without optical interference and without any color cast. It just takes longer to do it. With DSLR digitization, we add hundreds of other variables instead. Let’s keep it in mind: We wanted to recreate a film scanner with our digital camera that is better and faster than a film scanner. What hubris!
Get a scanner, install Silverfast – it will save time, nerves and a lot of money.
Epson V850 with Silverfast as DNG file. Converted with Negmaster 2.3.
Images © Lukas Büsse 2021.
Additional information:
Negmaster Homepage: https://negmaster.com/
Negmaster Instagram: https://www.instagram.com/negmaster/
Lukas Büsse Homepage: https://lukasbuesse.de/
Lukas Büsse Instagram: https://www.instagram.com/lukas.buesse/
We have a favour to ask. We want to make these online articles free to the world. We see it as our contribution to the photographic community. You can help by subscribing to our awesome analogue photography magazine – https://shop.silvergrainclassics.com/subscriptions/