Electro-Magic for Non Wizards:
How to Scan whole rolls with your Nikon Coolscan 5000ED
by Ludwig Hagelstein

Not too far in the past, I acquired a new in box Nikon Super Coolscan 5000ED. Immediately after trying it out for the first time on my Windows 10 PC with the original Nikonscan Software, I was amazed how well this almost 15 year old scanner performed, delivering the image quality everyone else was saying it delivered.
One thing, however, bugged me. Usually, I scan uncut rolls since I like to print from uncut rolls in the darkroom as well – Some like it, many hate it. For me, it´s quicker and gets the job done, too. The only real downside of this is the inability to produce good contact prints. Since the 5000 ED technically is able to scan whole, uncut rolls of film, I thought I should just get the right adapter and be done with it. However, these are costly. Insanely costly.
A quick google search later, and with an odd feeling of “should I really do this when I only ever soldered in a new capacitor into a 20$ old plastic fantastic Minolta X-300” building up, I decided to try out an idea I had found on various websites, and in various forms: Hacking my existing film adapter to accept uncut, whole rolls of 35mm film.
When Nikon, back in 2003, developed the Super Coolscan 5000ED, they envisioned a modular and highly capable desktop scanning device suited for both amateurs and professionals alike. However, from a business point of view, offering such a “do it all for everyone” device can be counterintuitive and thus, Nikon put a price tag on the scanner’s modularity.
By default, the Super Coolscan 5000 ED with an original price of around €1.400 came with two standard film intakes: One “dummy” non-electric manual slide adapter for single, mounted 35mm slides, the MA-21, and one motorized automatic film feeder for film strips of up to six images, the SA-21. For those with a need to scan batches of slides or whole rolls of film, Nikon offered two rather expensive additional film feeders. The automatic whole roll feeder, the SA-30, cost about €700 back in the day, and is traded for approximately double of that today on various online sales platforms, a price I was not willing to pay.
After some online research, at first focused on finding a cheaper SA-30, I came across a handful of websites with posts about modified standard SA-21 altered to work just like the SA-30. Some vendors of scanning accessories even sell modified versions of the carrier, and so I thought, “this could be an option for me as well”. Since I was still hesitant to buy a modified film carrier for €500 I decided I would do it myself. The only tools required for the job seemed simple enough, too: A fine screwdriver and a soldering iron.
At first, the task ahead of me seemed – and felt – rather daunting. Resoldering something on a circuit board of an expensive scanner´s most important – though replaceable – part? What if I did something wrong? Would I short out and ruin my newly acquired Coolscan? Would. Could… If I wanted guarantees, I should have bought a toaster instead, I thought, and thus went ahead with my plan.
Originally, the method of modifying the SA-21 to take in whole rolls was discovered by a German handyman named Helmut Stöpfgeshoff, who, after lots of experimentation and circuit measurements came up with a procedure to bridge two pins on the film feeder´s circuit board. This, however, is not the method I recommend, since its non-reversible and involves mechanically bending two pins together before soldering them into their new position.
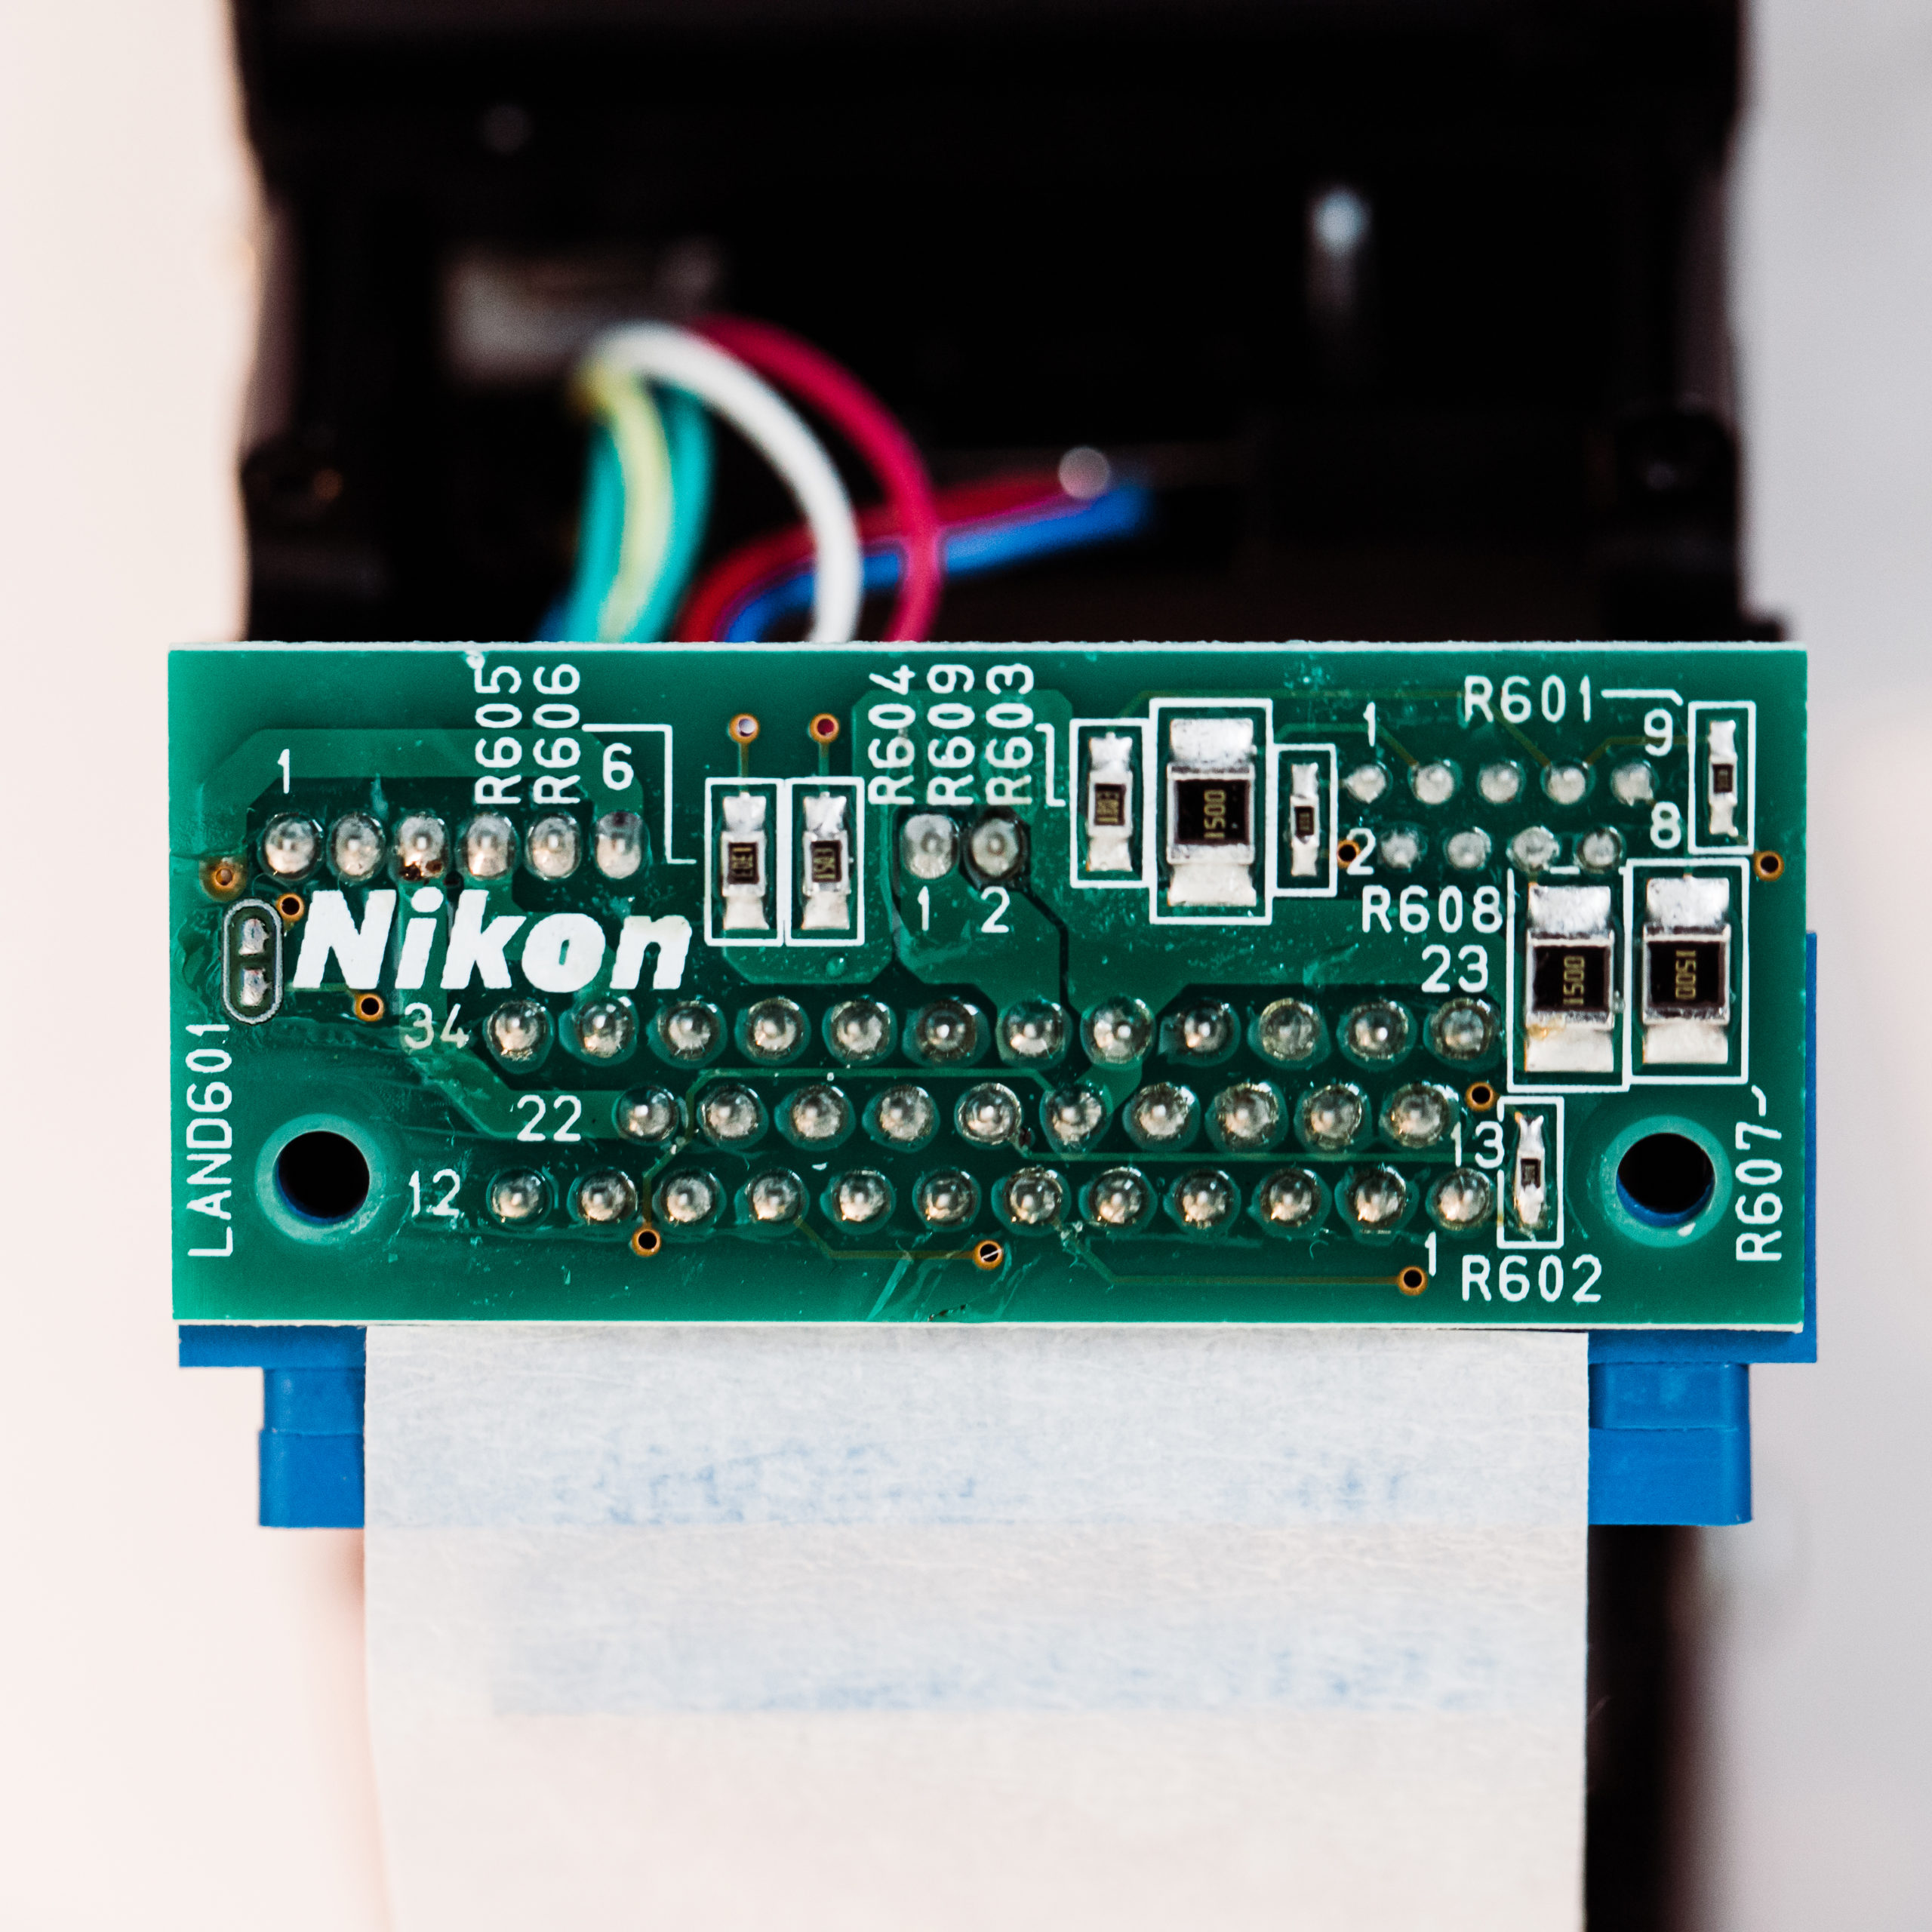
By far the easier method is exploiting Nikon´s own shortcut on the circuit board. Nikon´s own shortcut, you say? It seems, Nikon rationalized production of their scanner parts and decided to use the same circuit boards for both the SA-21 and the SA-30, with only a minor difference in the form of a small gap between two encircled solder joints. If the aforementioned gap is closed / bridged by a bit of new solder, your Coolscan will now recognize the SA-21 as SA-30. Should you wish to remove that feature again, it is as simple as desoldering the previously made bridge.
To get to the circuit board, just unscrew the 6 silver screws on the underside of the SA-21, then open the feeder just as you would for cleaning, and carefully lift out the inner assembly for further processing. In the next step, slide up the clip holding the upper film guide in place and then gently lift it up until it comes loose. Do not use excessive force. Afterwards slide off the metal clip that held the upper assembly. In the next step, screw out one screw in the middle of the scanning recess. It holds the upper pressure plate and needs to be removed in order to access the necessary screws for the next step. Now, unscrew the 8 silver screws (not the black ones) you are now able to see. At this stage, the whole remaining upper assembly will come off. Be sure to gently place it on the side as not to damage the orange flex cable. Now you can untuck the flex cable and place the whole assembly aside. Again, be careful not to damage it as this will ruin the film feeder.
The last step is relatively straight forward, just unscrew the last two remaining longer silver screws and gently lift up the circuit board and fix in place with a strip of masking tape so you can easily solder. Now heat up your soldering iron and carefully solder a bridge between the two, white encircled joints directly adjacent to the big “N” in “NIKON”. Now you can start reassembling the film feeder. Again, take care not damage the flex-cable and make sure not to use too much force screwing everything back together and stop screwing, once you feel a resistance in the plastic.

Before you completely reassemble the film feeder, however, depending on the level of dirt and dust inside it might be a very good idea to thoroughly de-dust it, once you’re at it anyway. The main emphasis here should be placed on the three little paired rectangular sensors controlling the film advance. Blow away loose specs of dust with a Rocket Blower and then either use a soft film cleaning cloth or brush to get the rest of the dirt. To access all the sensors, simply remove the black screws of the upper assembly, as opposed to the silver ones securing the lower half of the assembly to the upper part. Once everything is neat and clean, don’t feel overambitious and attempt to lubricate or wet clean anything. This will most certainly ruin the device. Just put everything together, count your screws and make sure you did not forget one, close the outer case and try out your newly modified SA-21/30.
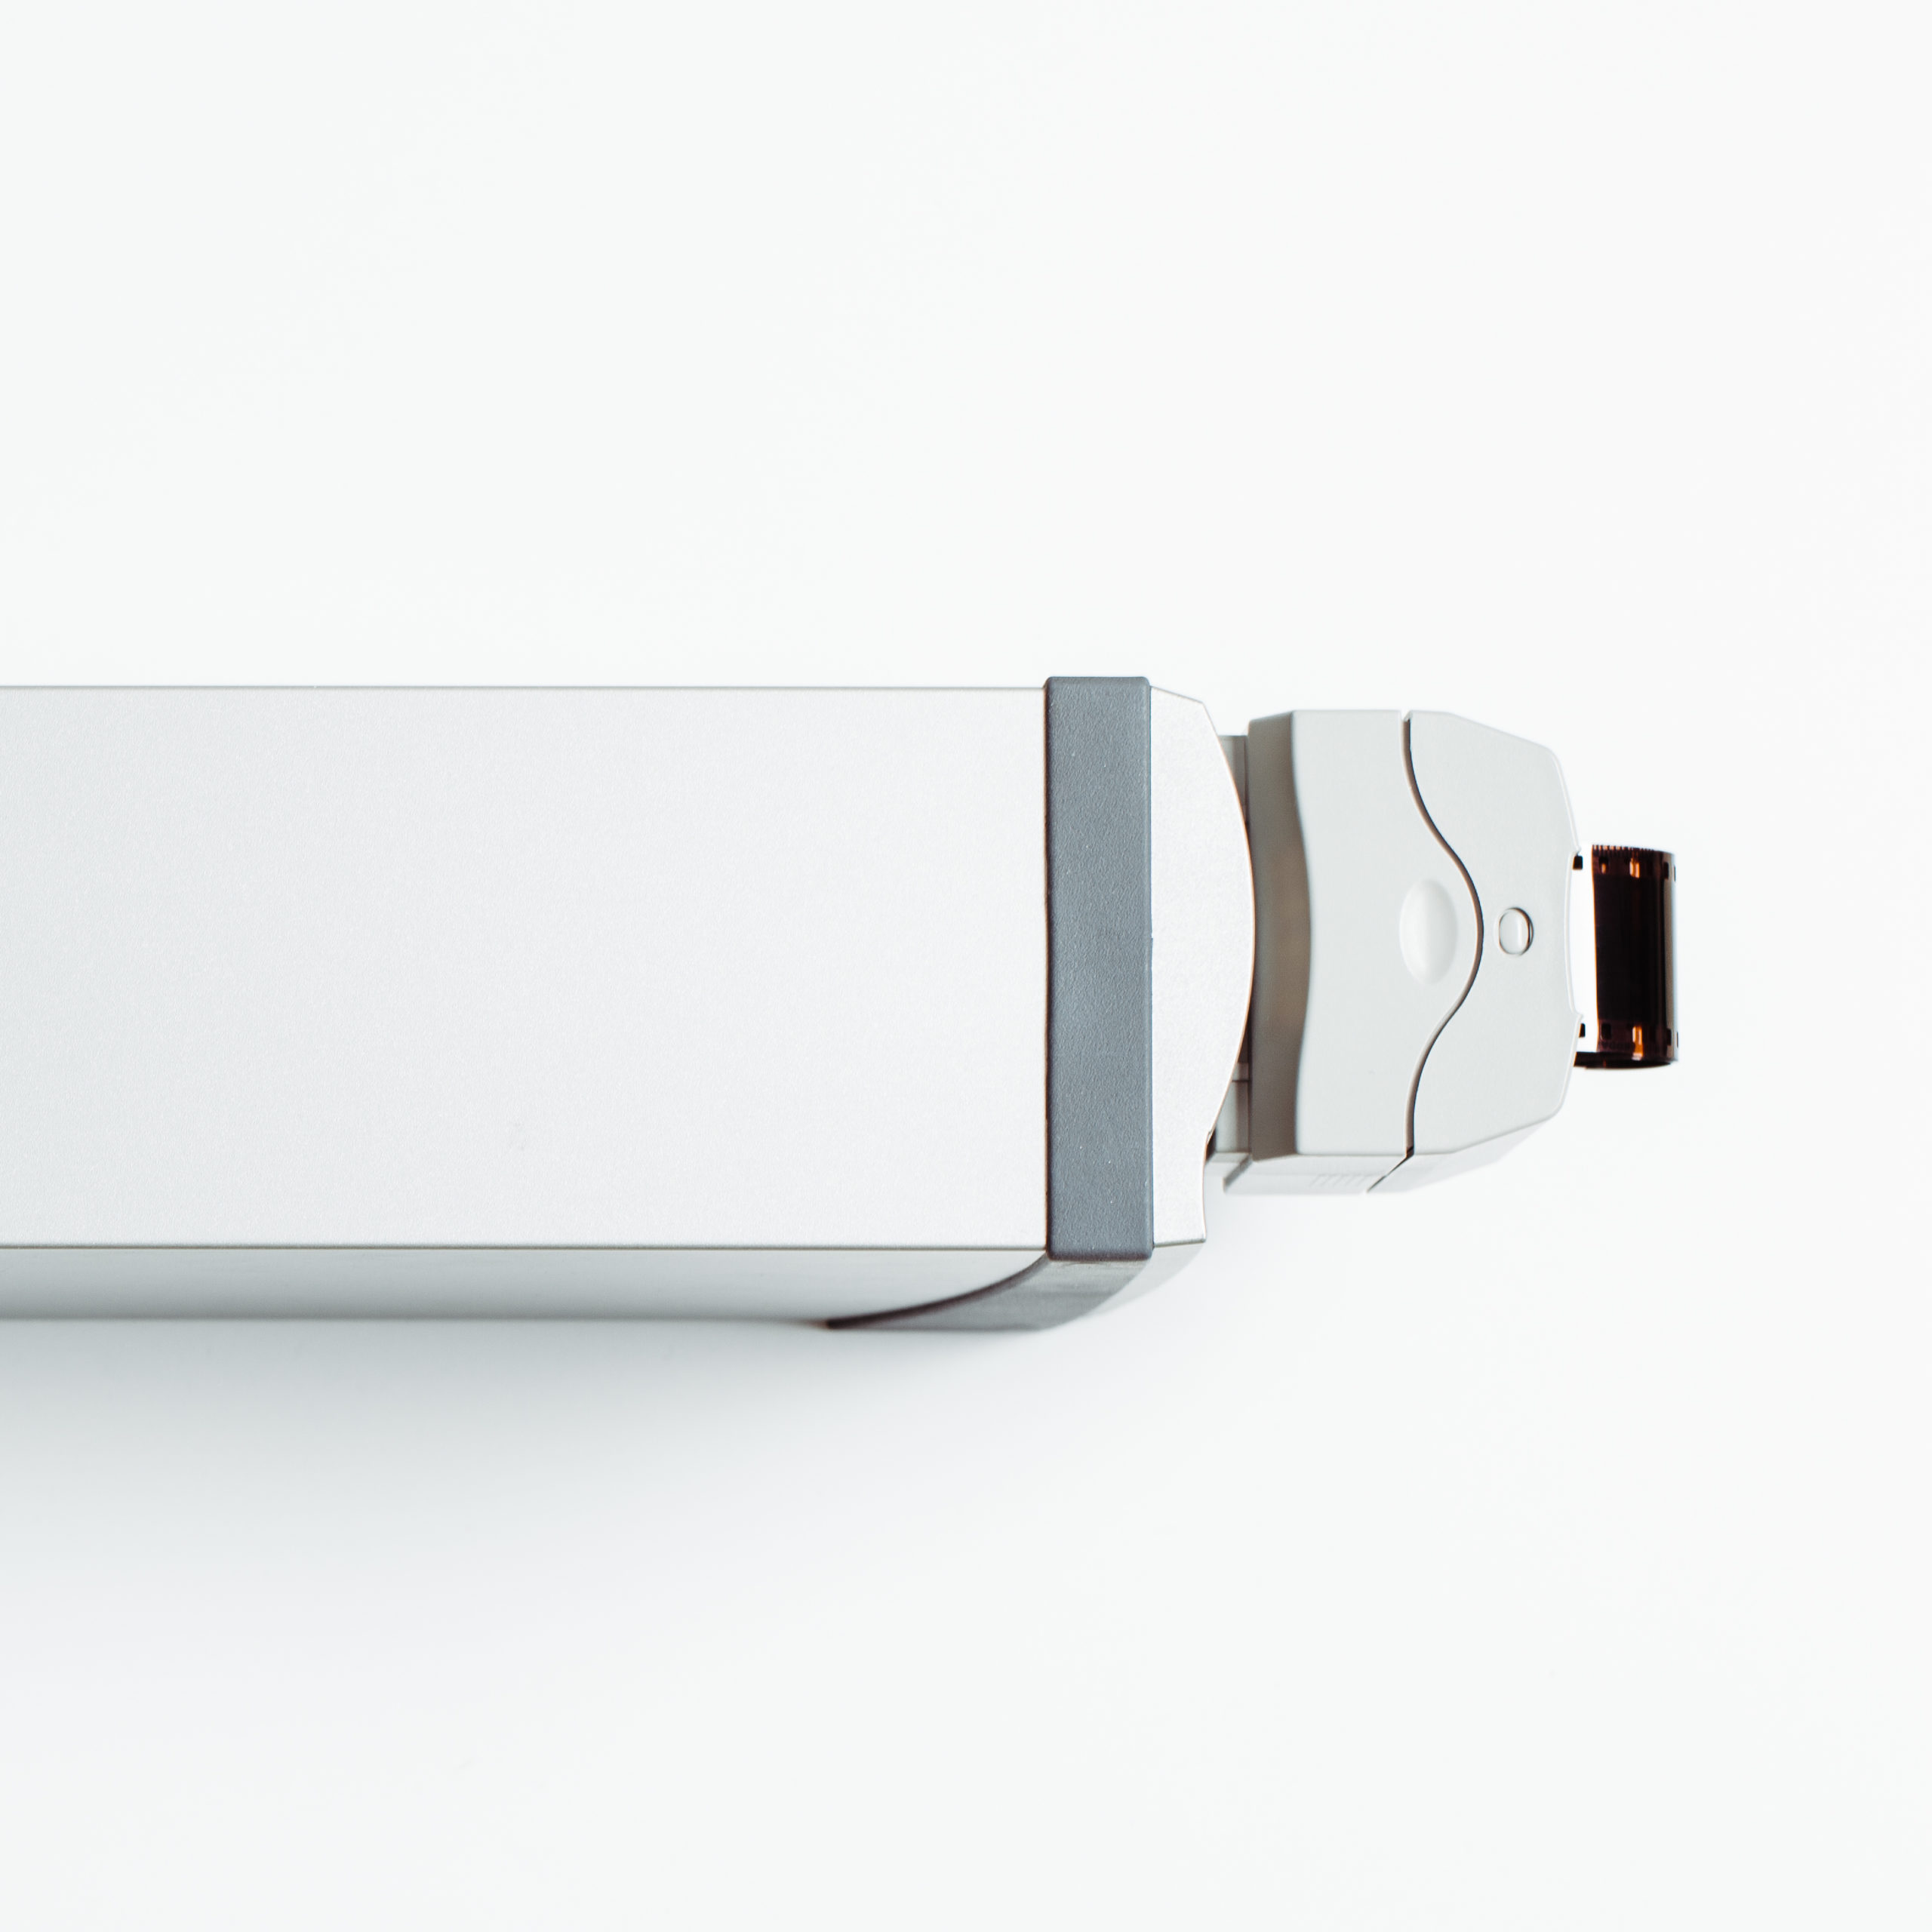
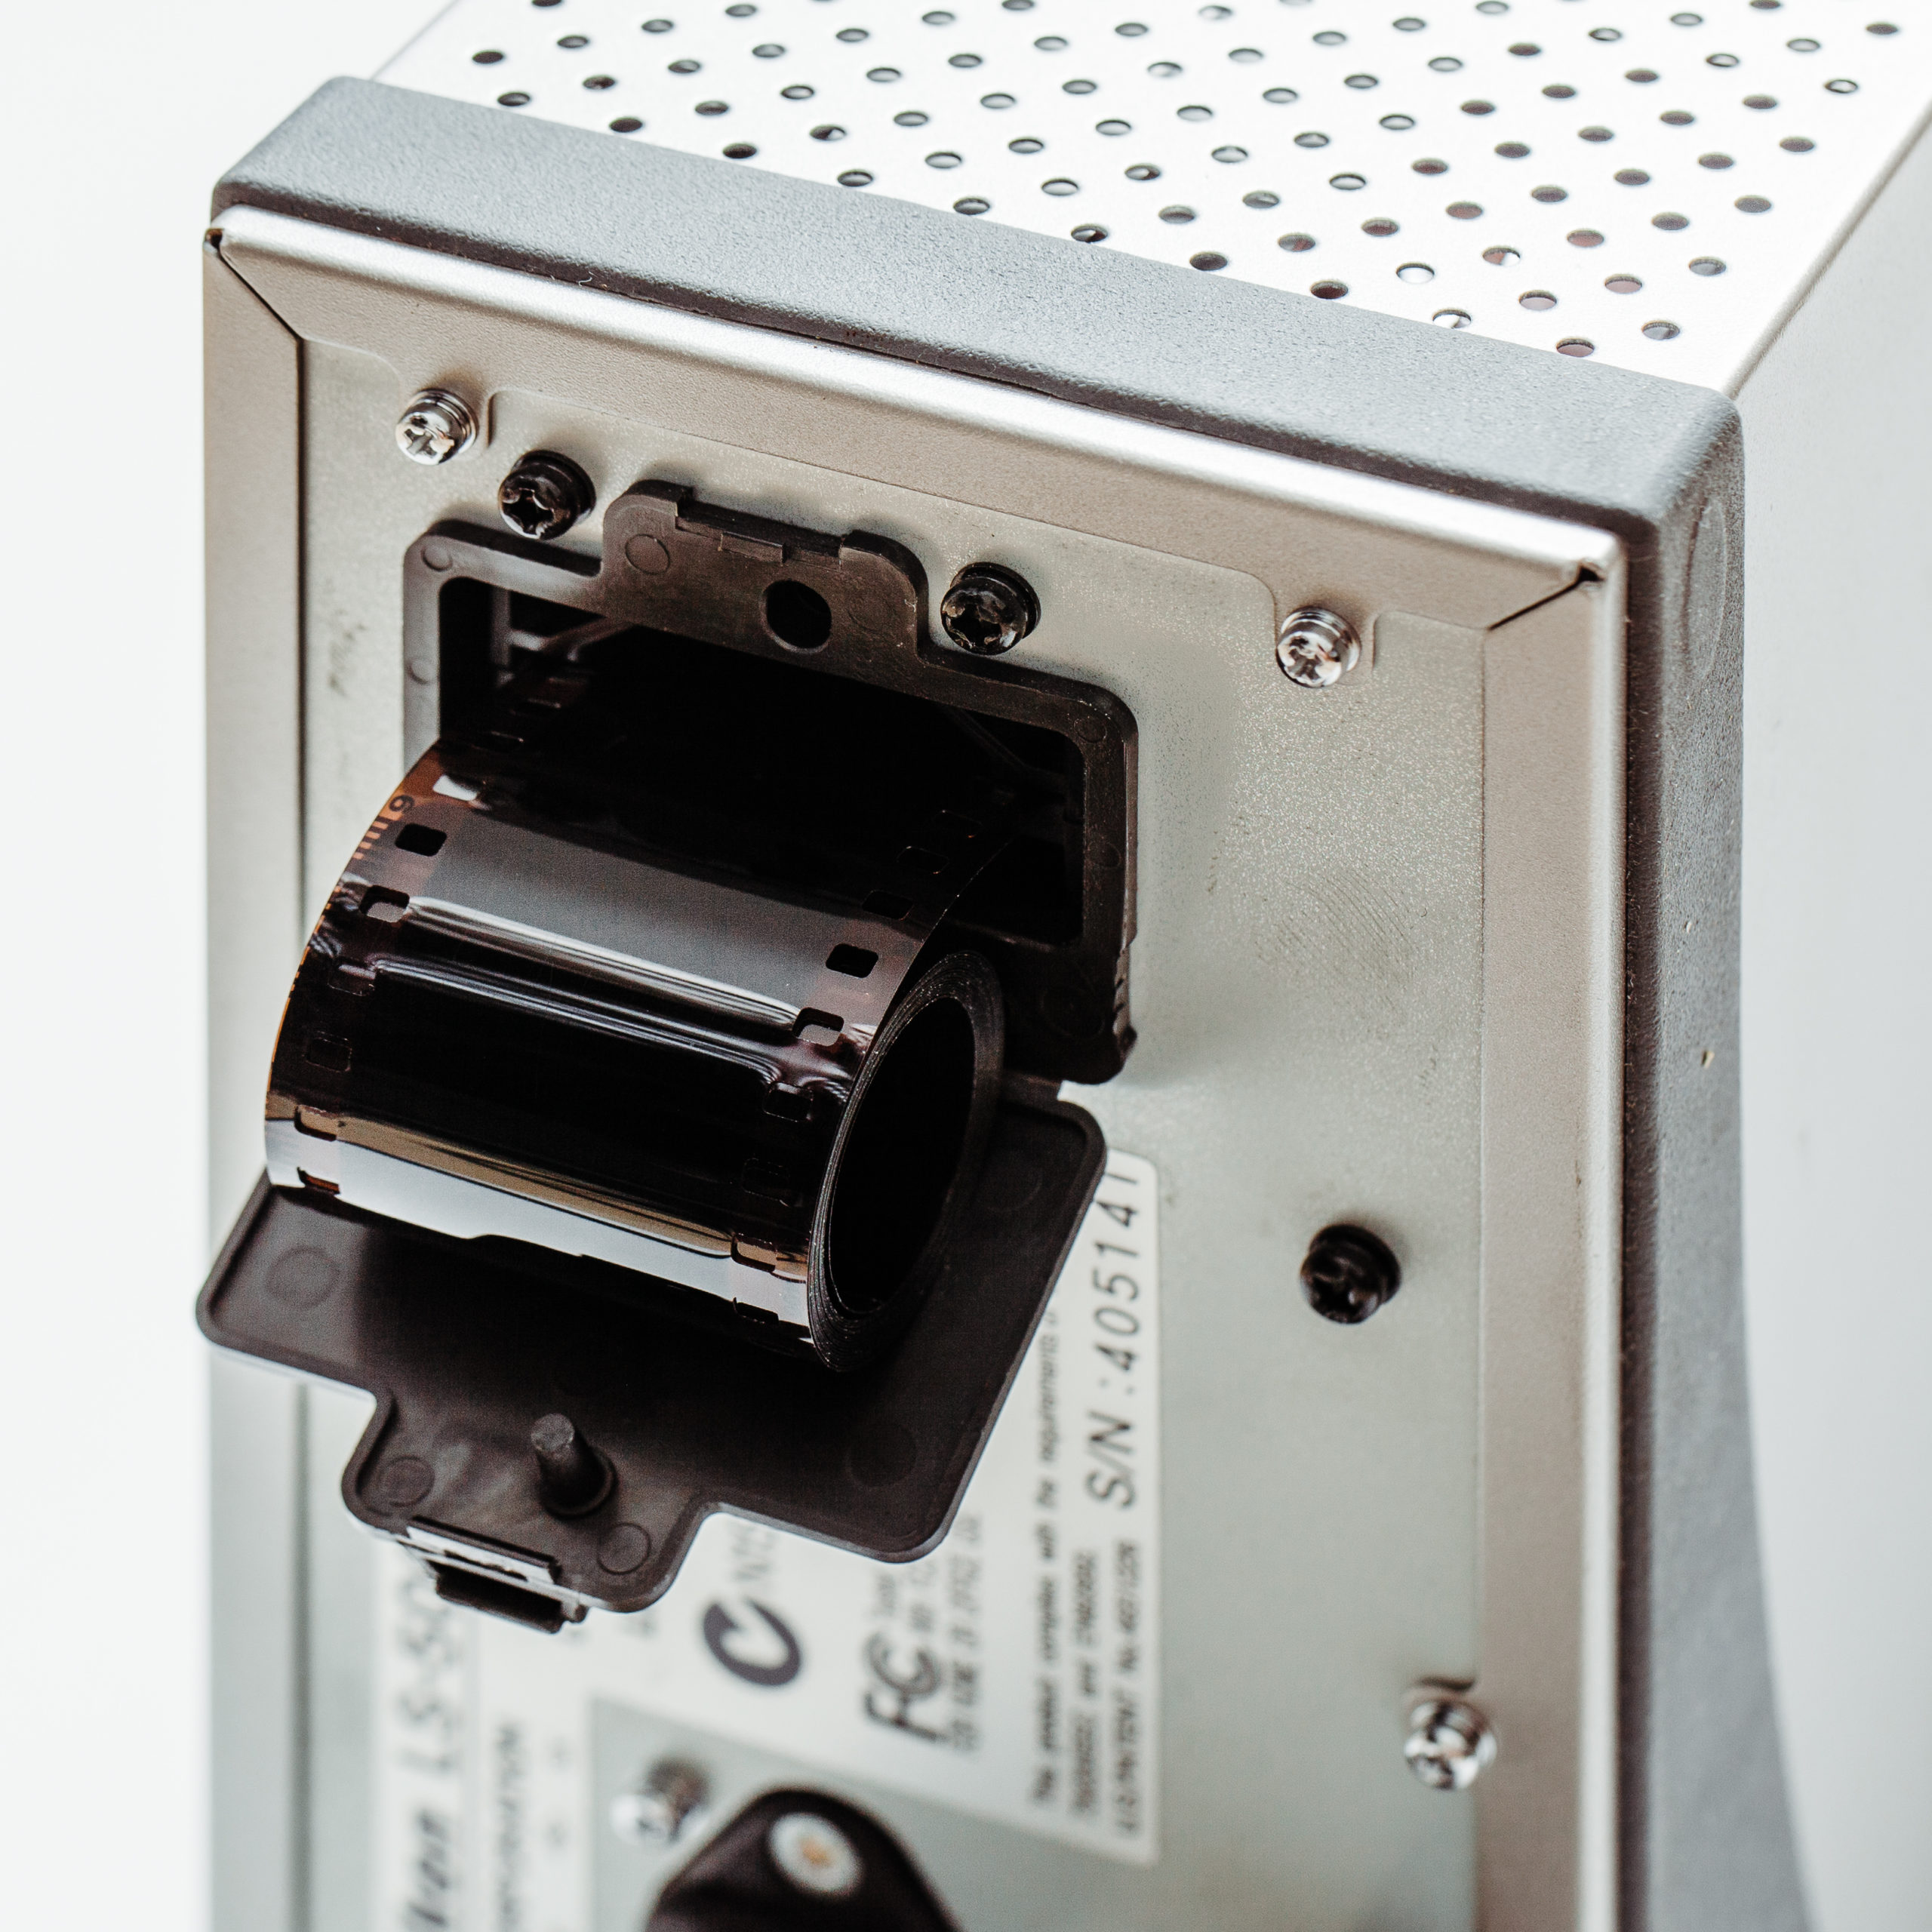
The moment you open your preferred scanning application, the program will recognize the SA-21 as SA-30, and in Nikonscan 4, for example, a click on the index button will draw in the whole roll of film and will index scan it in less than 60 seconds. Most importantly though, do not forget to open the little black plastic flap on the scanner’s aft, since otherwise the film will jam up inside the scanner, which for several reasons is a very unpleasant thing to occur. Equally important is not to try to remove the film from the back of the scanner. Always eject the film properly. Otherwise, have fun enjoying your newly updated scanning equipment!
Disclaimer: Modifying electrical appliances bears the risk of serious injury to you or destruction of your device. Any attempts made to alter equipment are solely within your individual responsibility. Attempt at your own risk.

YOU PREFER PRINT?
You might be interested in our quarterly journal then. SilvergrainClassics is the world’s first truly global print magazine covering the entire world of analog photography. If you want to learn more, please click the button below.